

I started more seeds this past weekend! Some of my peppers and eggplant were taking their own sweet time sprouting, but they finally did and I got them into their pots and under the grow lights. If you haven’t checked out my previous post about seed starting, do! I mention that my preferred way to start veggie seedlings is to pre-sprout the seeds in a tiny greenhouse environment before putting them into pots. This ensures that they all germinate for me. So, I’ve got all the veggies on their way, except the cucumbers which are a super fast, overachieving little seed so for me, I find that starting them indoors 4 weeks before the last frost date is plenty o’ time.
On Sunday I started some herbs and flowers, using a SUPER FUN METHOD that saves a TON of space. I saw it on Instagram last year and tried it that very same day. It works so very well and I really like this method for things that I want a lot of — herbs, onions, marigolds, nasturtiums. I learned it from this person who calls them Seed Snails. And it is GENIUS.
The basics are that you get a sheet of plastic something you’ve got in your recycling or trash bin - a mailer bag, a thick bag from potting soil, a cat litter bag, stretchy packing wrap, bubble wrap…something to keep soil and water in. You’ll want to cut it to be about 6-8” wide and maybe 18” long. Like this:
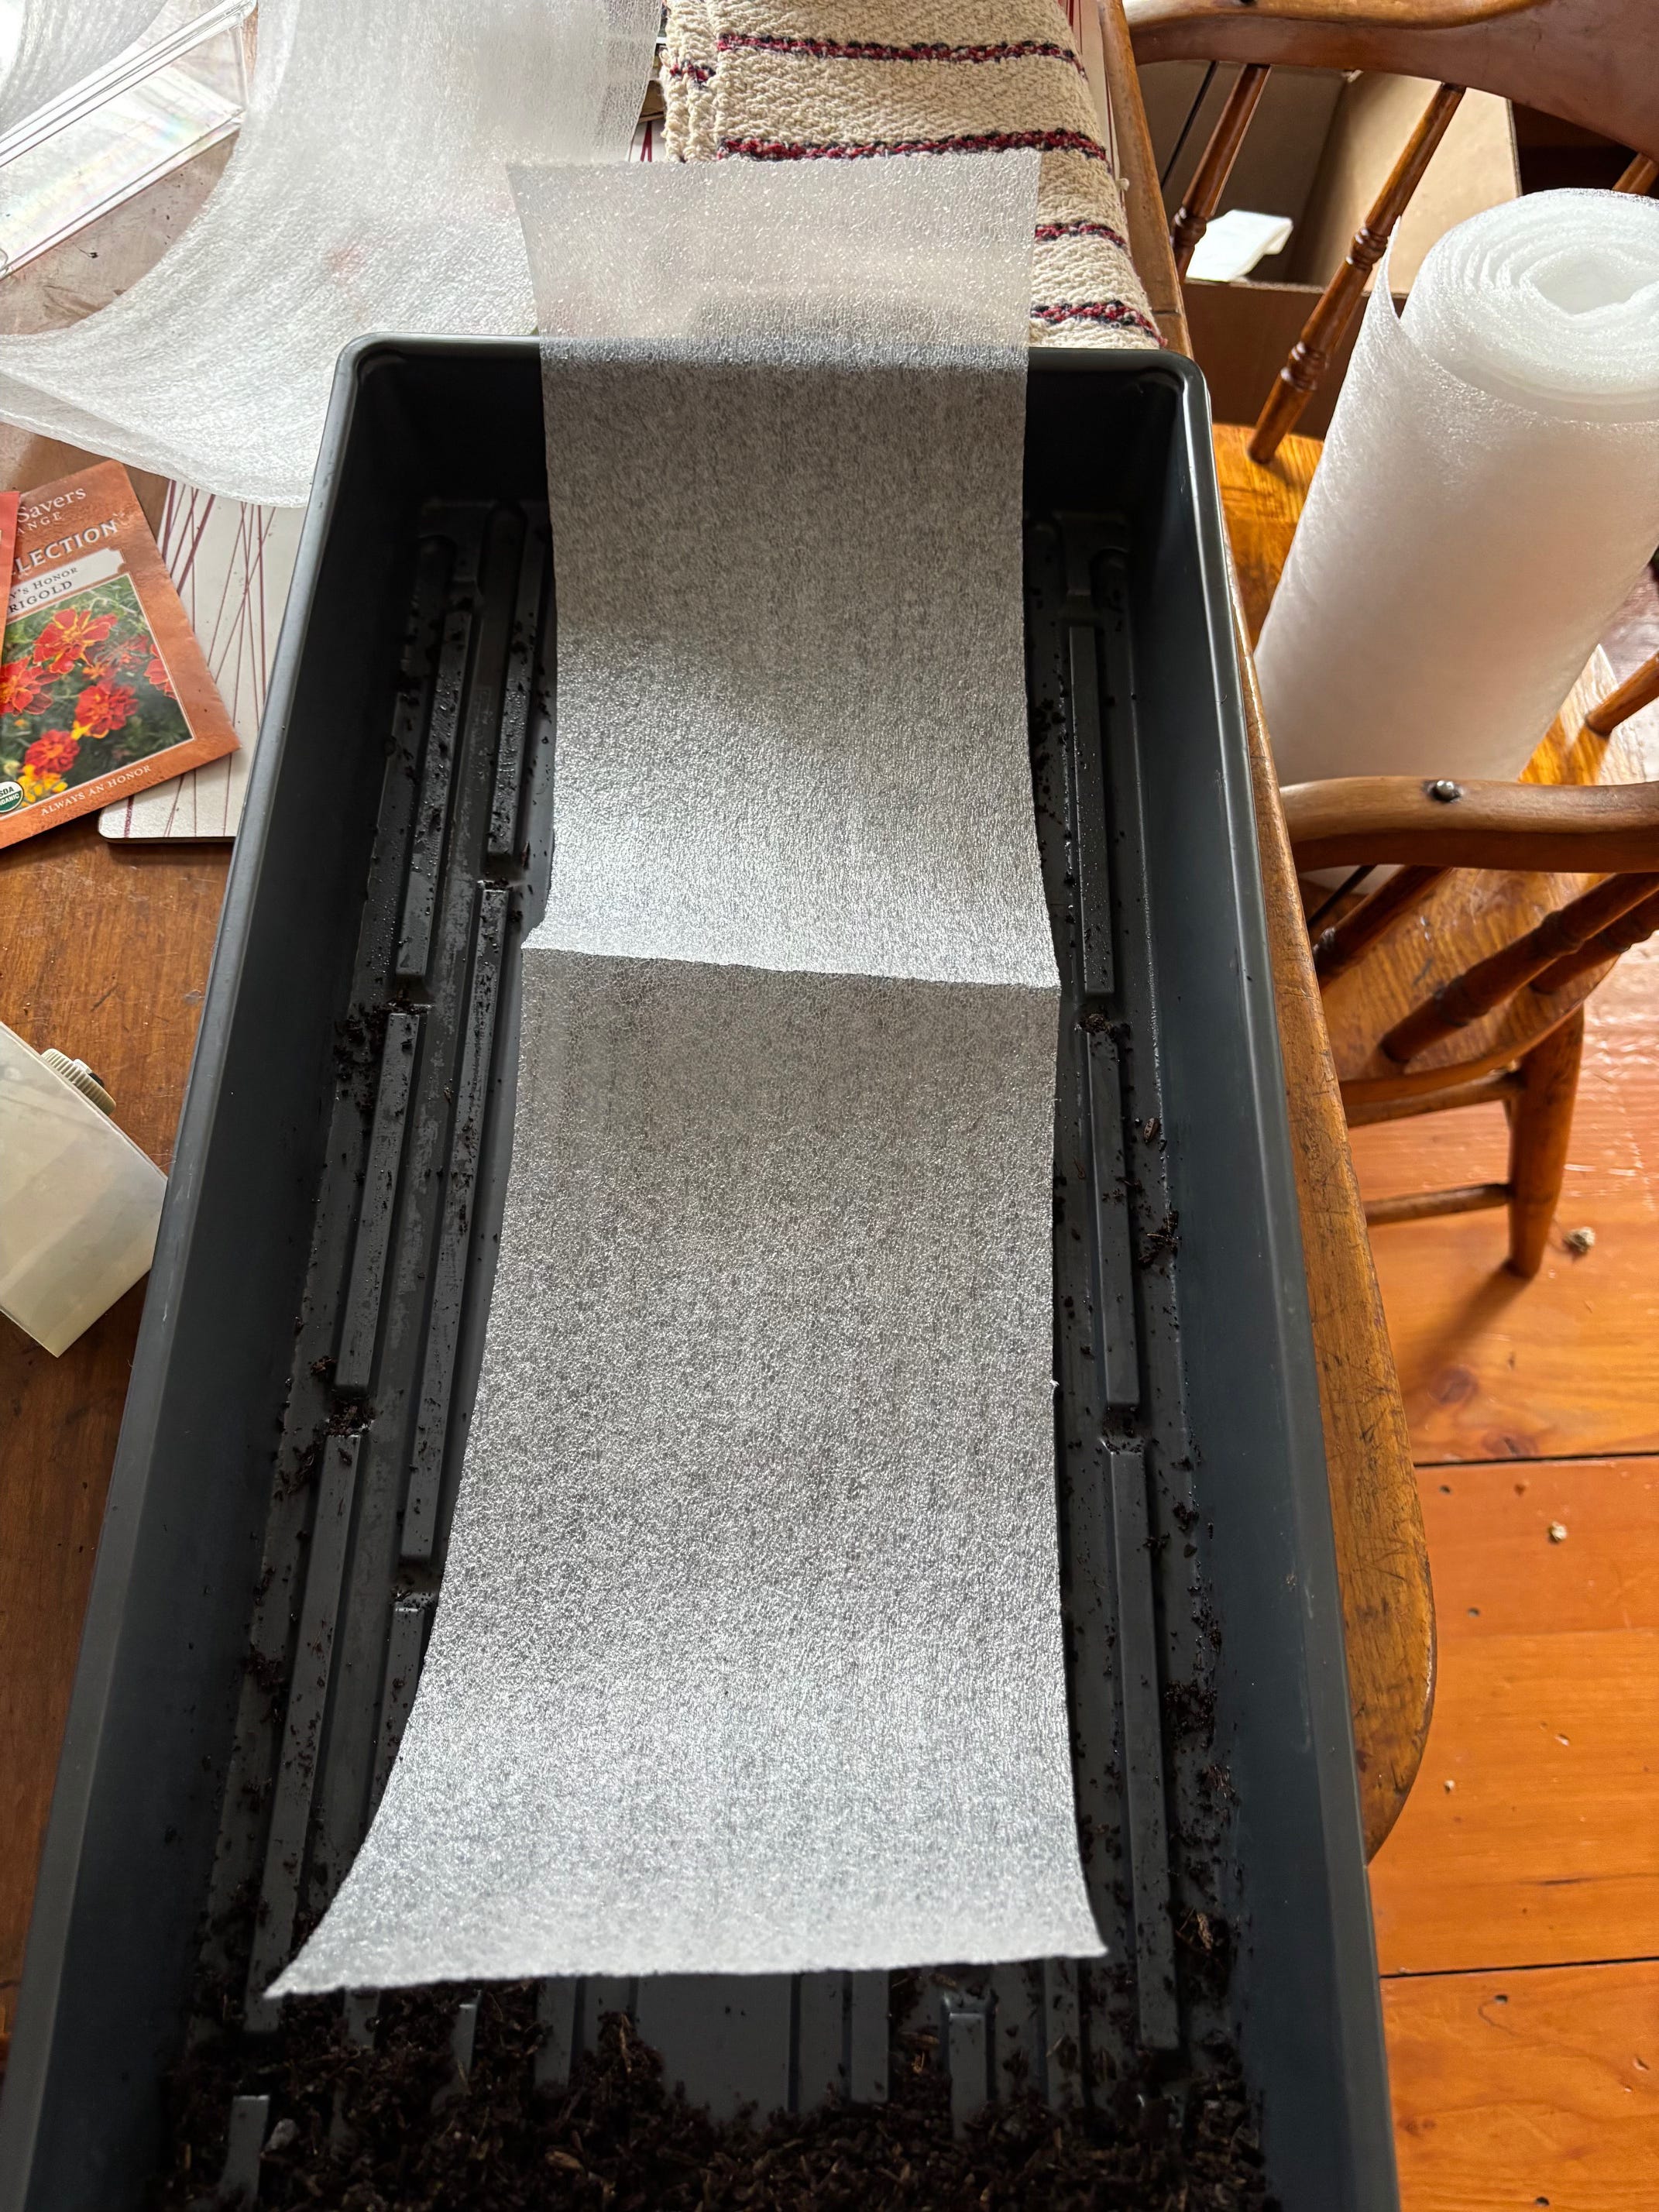
Stretchy wrap from when we moved to our new house. Last year I used a few bubblewrap mailers and just split them open to be as long as it could be - worked great!
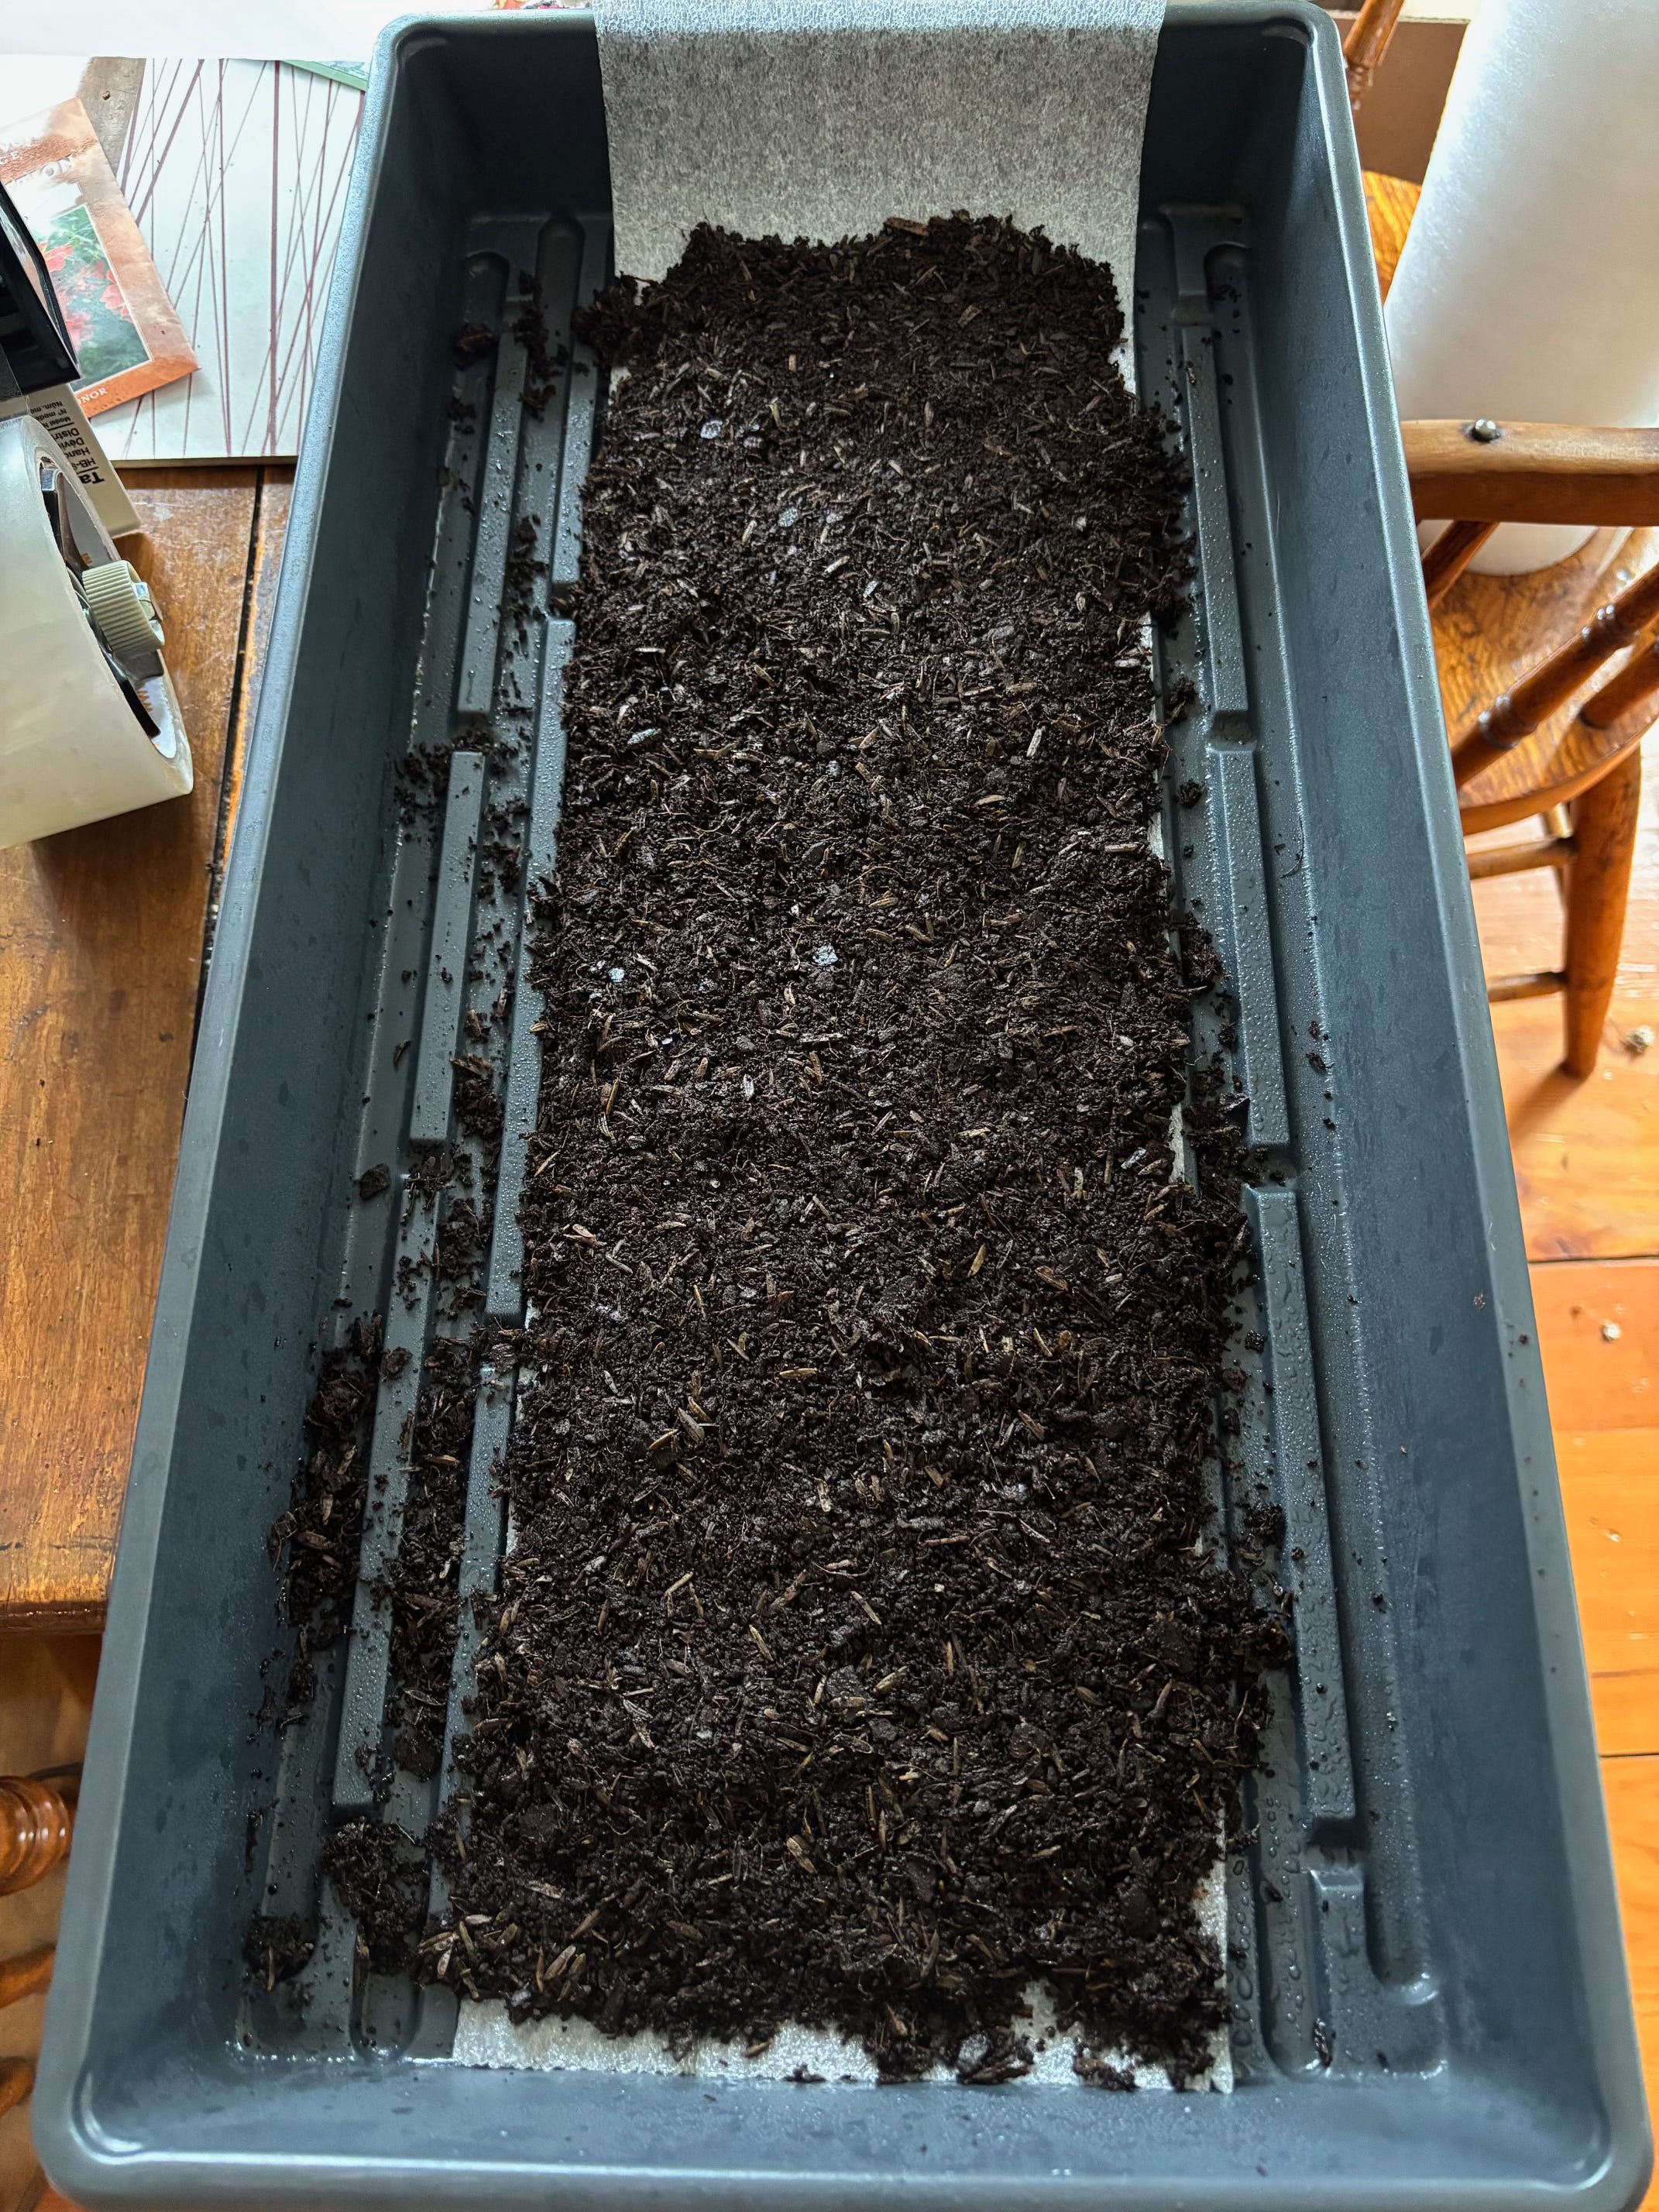
Next you’ll fill your wrap with a thin layer of soil — maybe 1/4” thick. Fill from side to side, but give yourself a few inches of space at one end of the wrap. Pat it together so that it isn’t too loose. Like this:
At this point, grab some packing tape and cut a piece the width of your wrap.
Ok, now roll up the whole thing, not super tight, but tight enough to hold it together. The soil will push its way up the wrap, so having those few extra inches on the back end is helpful. Now you’ll tape it up the side and gently tip it over to fill in the bottom and top of the “snail” with the soil that fell out. I keep my hand underneath to hold any loose soil in and transfer it to a tray to sit upright.
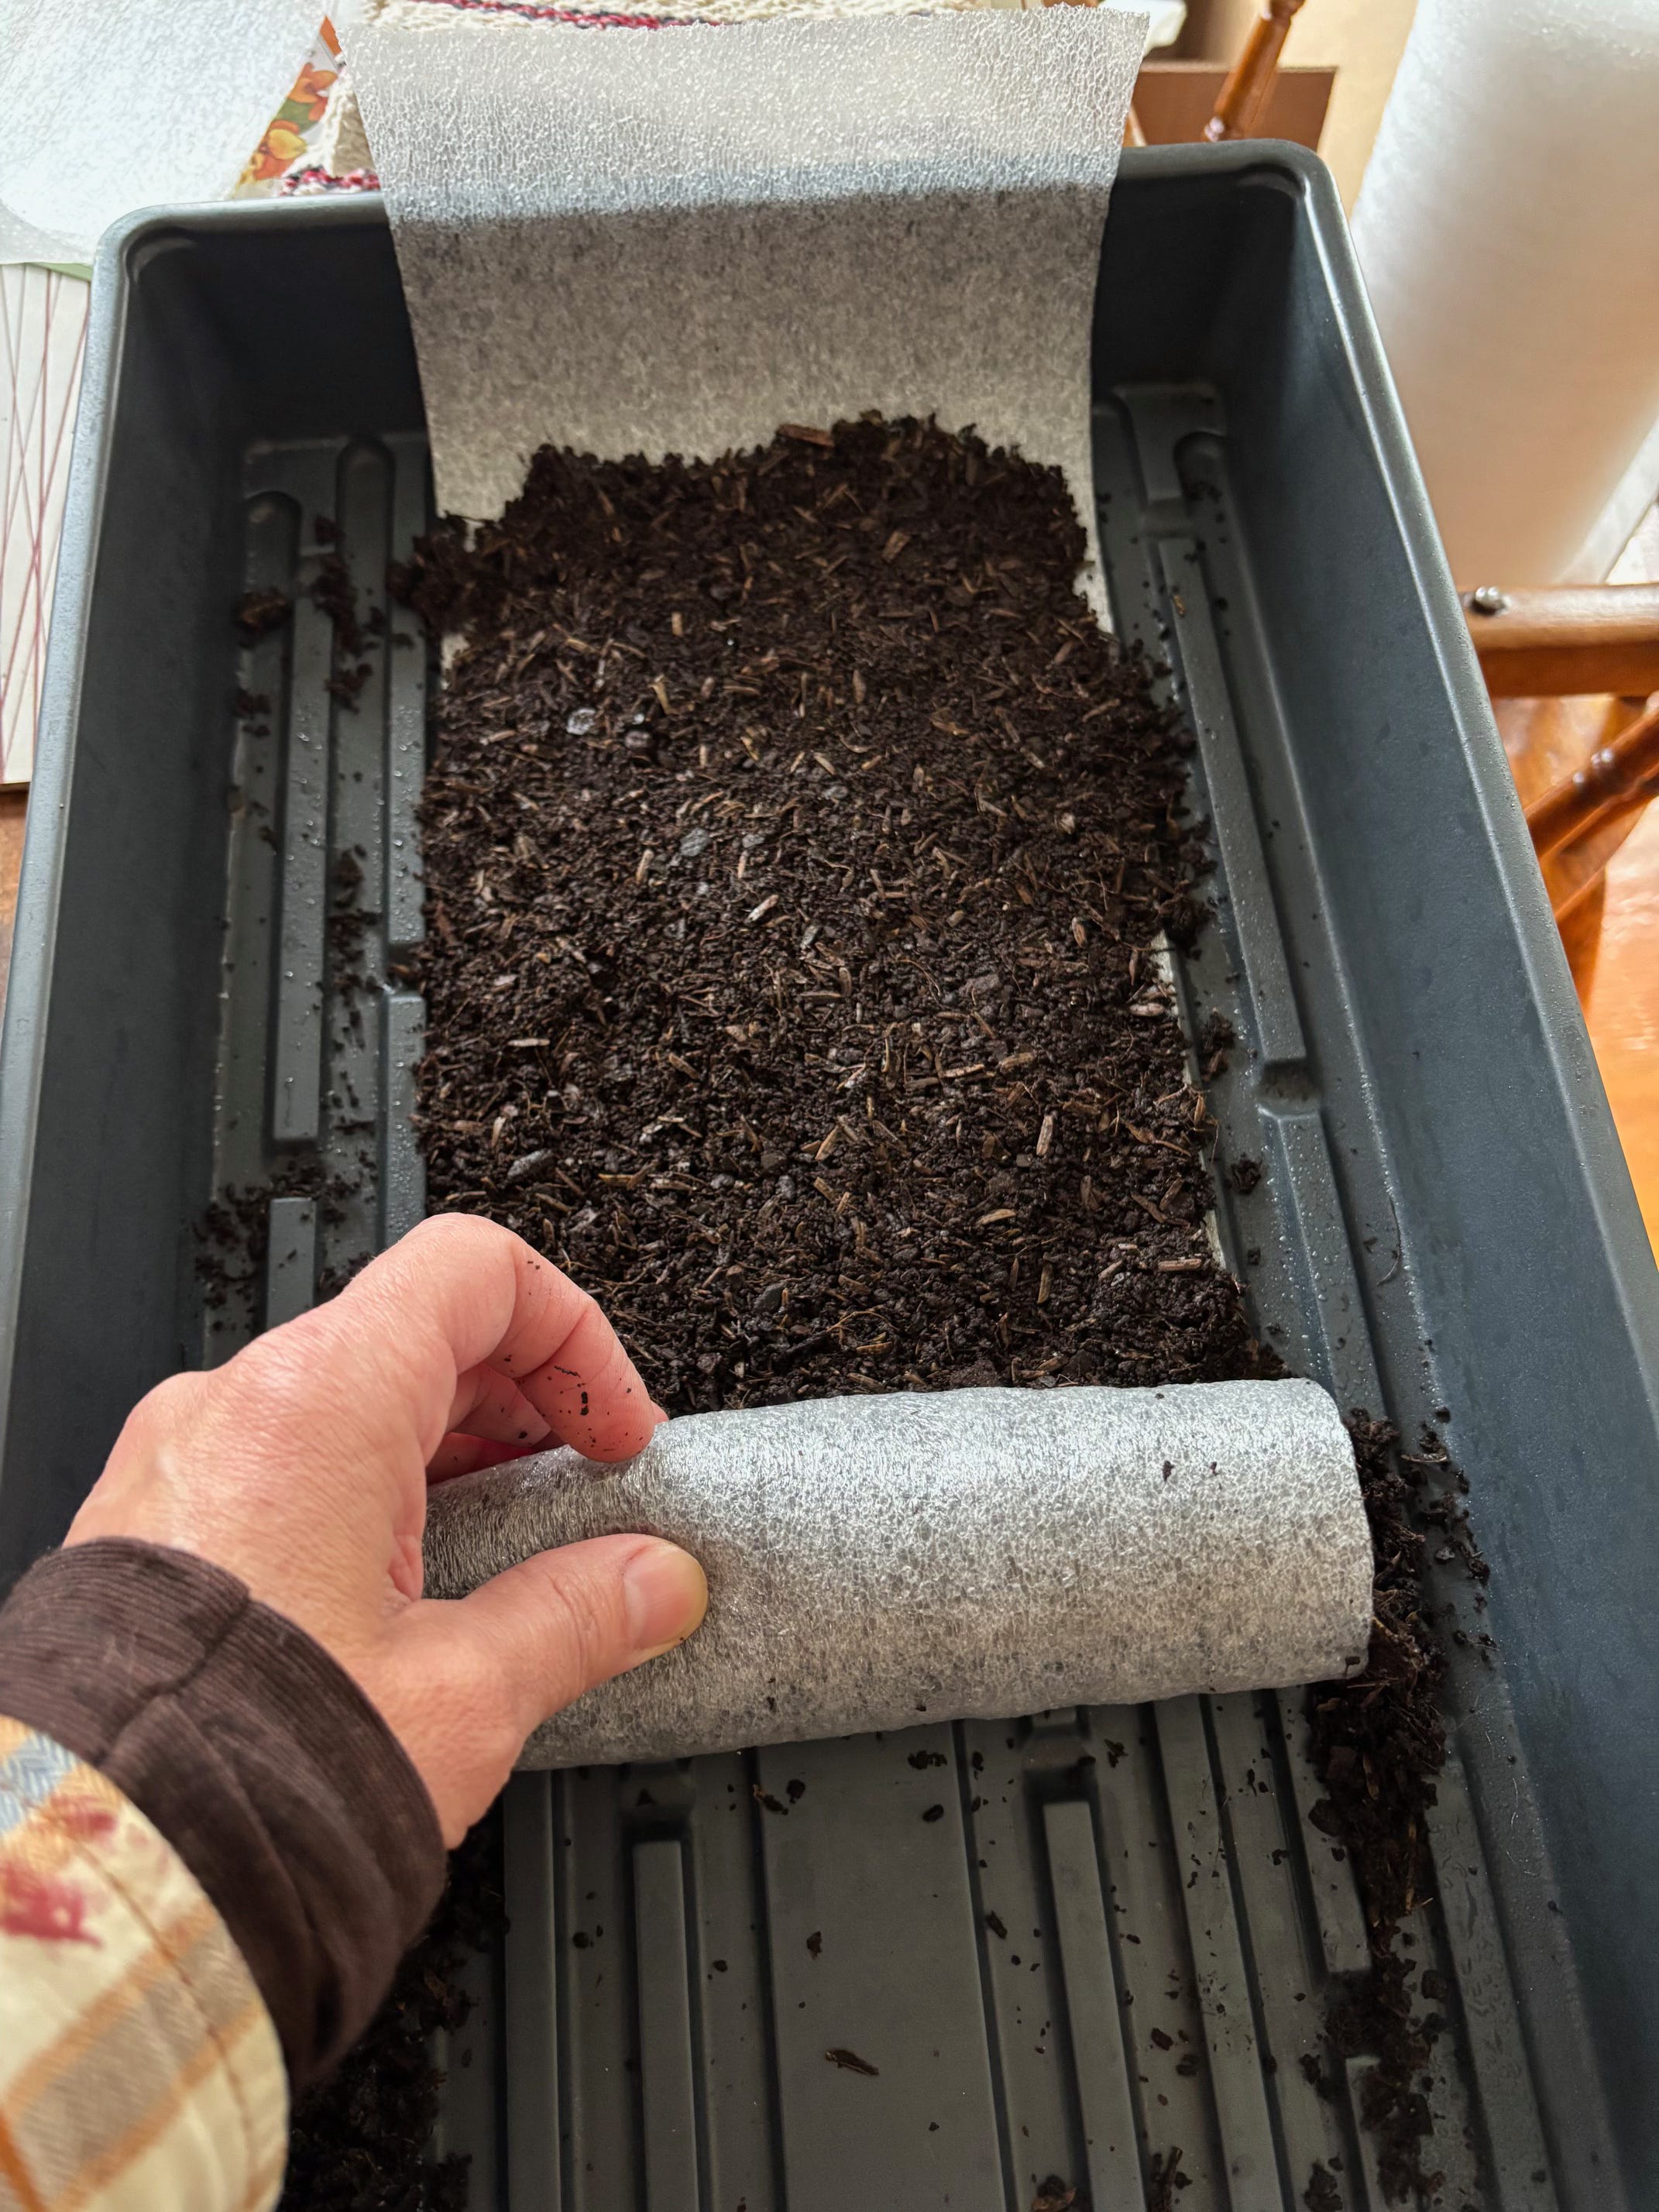
rollin’ rollin’ rollin’…
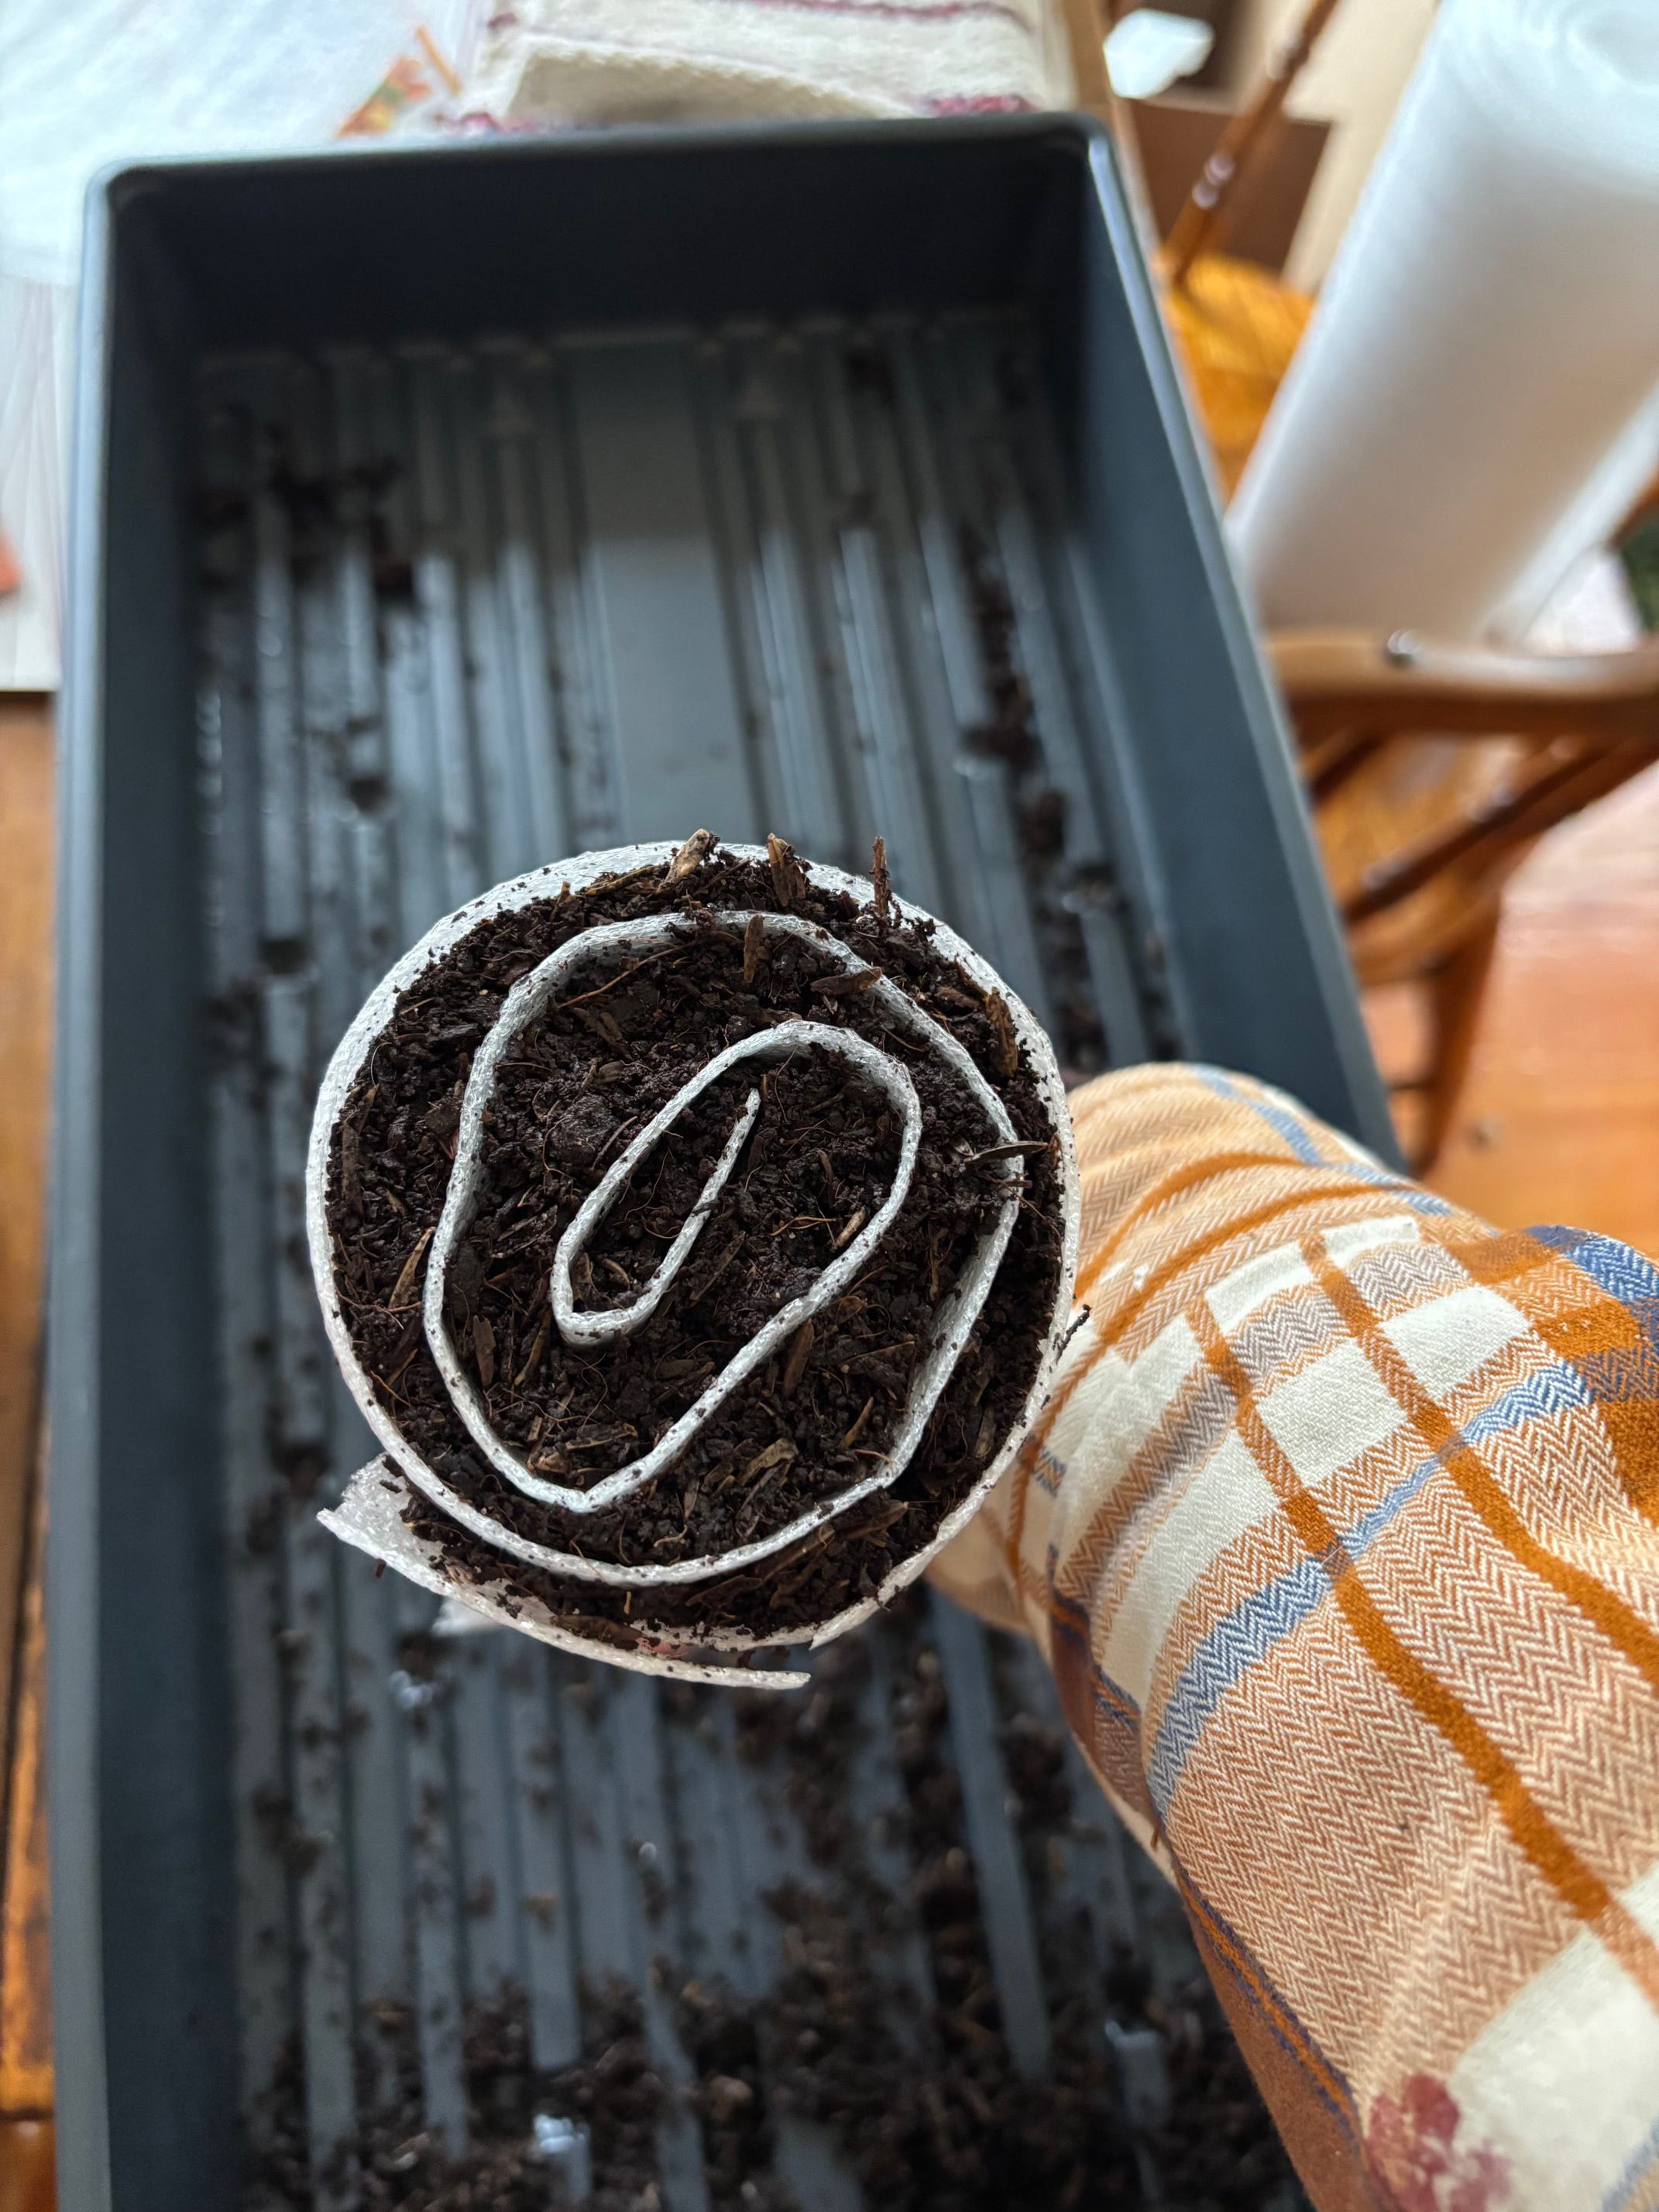
TA-DA! Seed snail! Now keep going and make several more.
After you’ve made your seed snails, now you plant! You can get a lot of seeds in this small space. The idea is that when you unroll it after the seedlings are going, the roots are strong and deep, the plants are neatly side-by-side, and it is super easy to gently lift them out of their snail for planting. It saves on soil, space, time and effort and it really is a genius way to start seeds. BIG FAN.
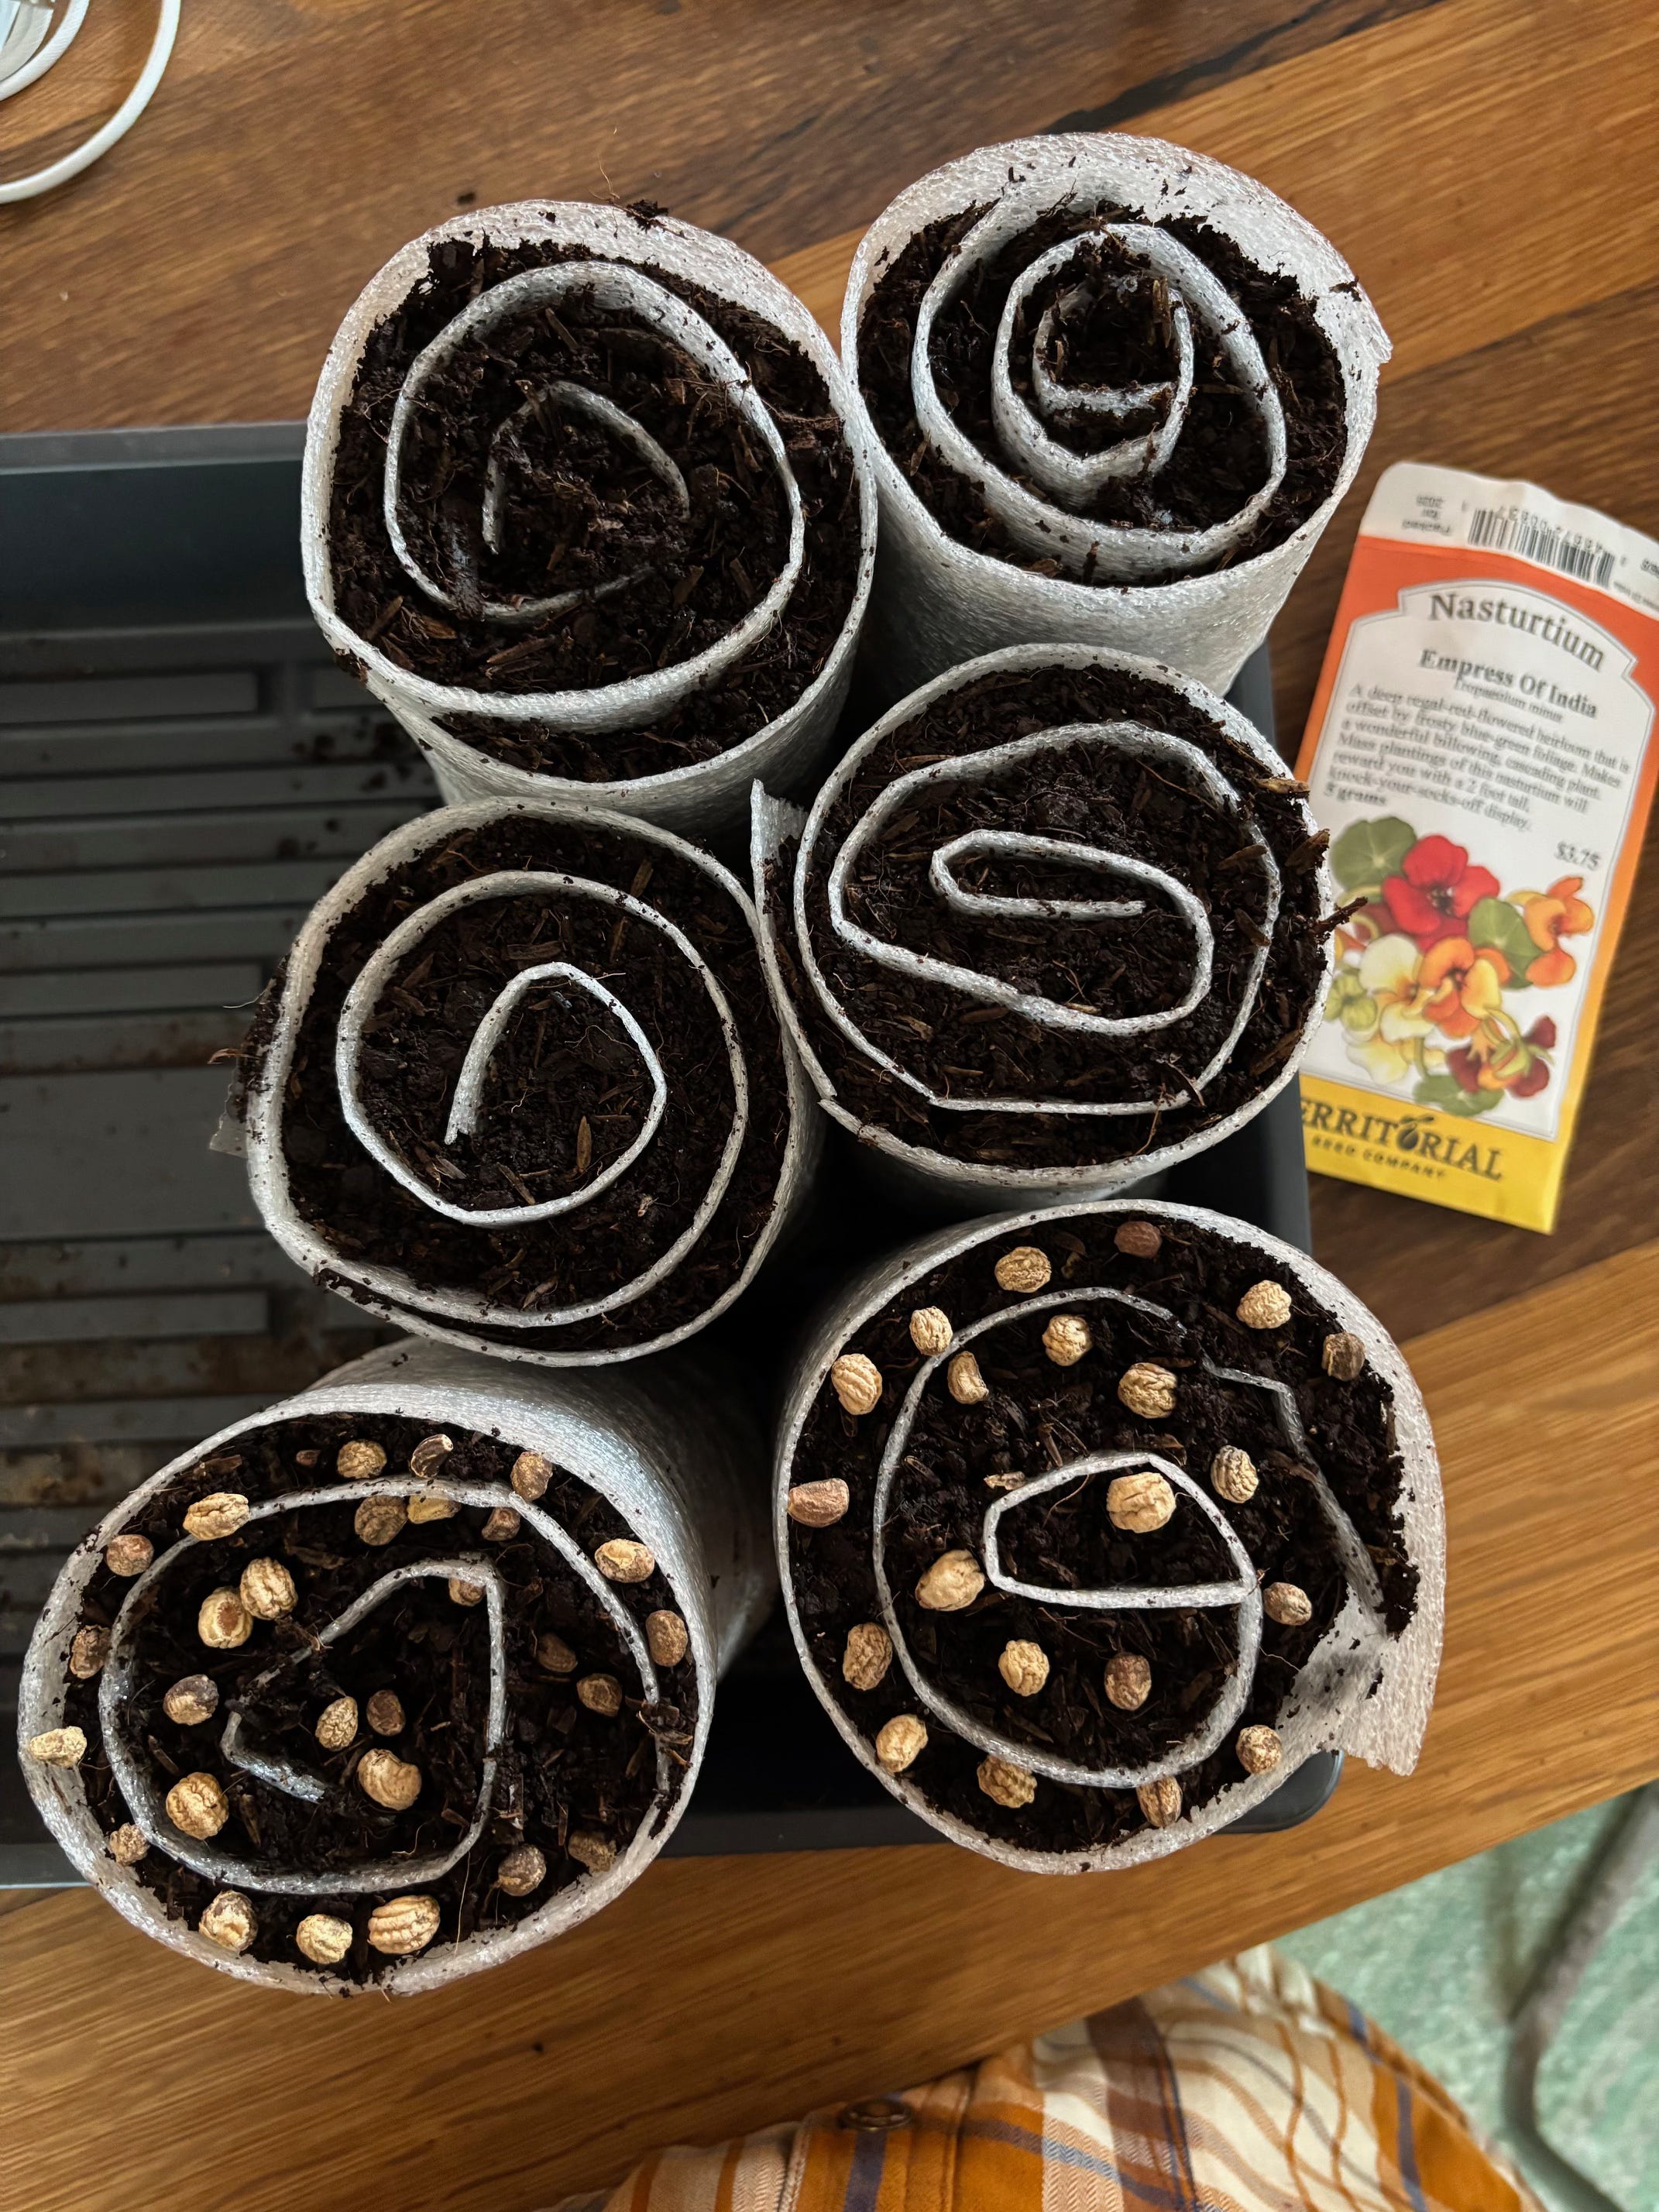
I plant loads of nasturtiums in my garden. The bees and I both love them! Especially in salads - their peppery bite and neon bright color is just what my summer heart craves. After laying the seeds out for spacing, I’ll push them under the soil and cover with vermiculite.
After I got these all planted, they went under the grow lights with another plastic bag from the recycling bin loosely draped over the top to keep moisture in.
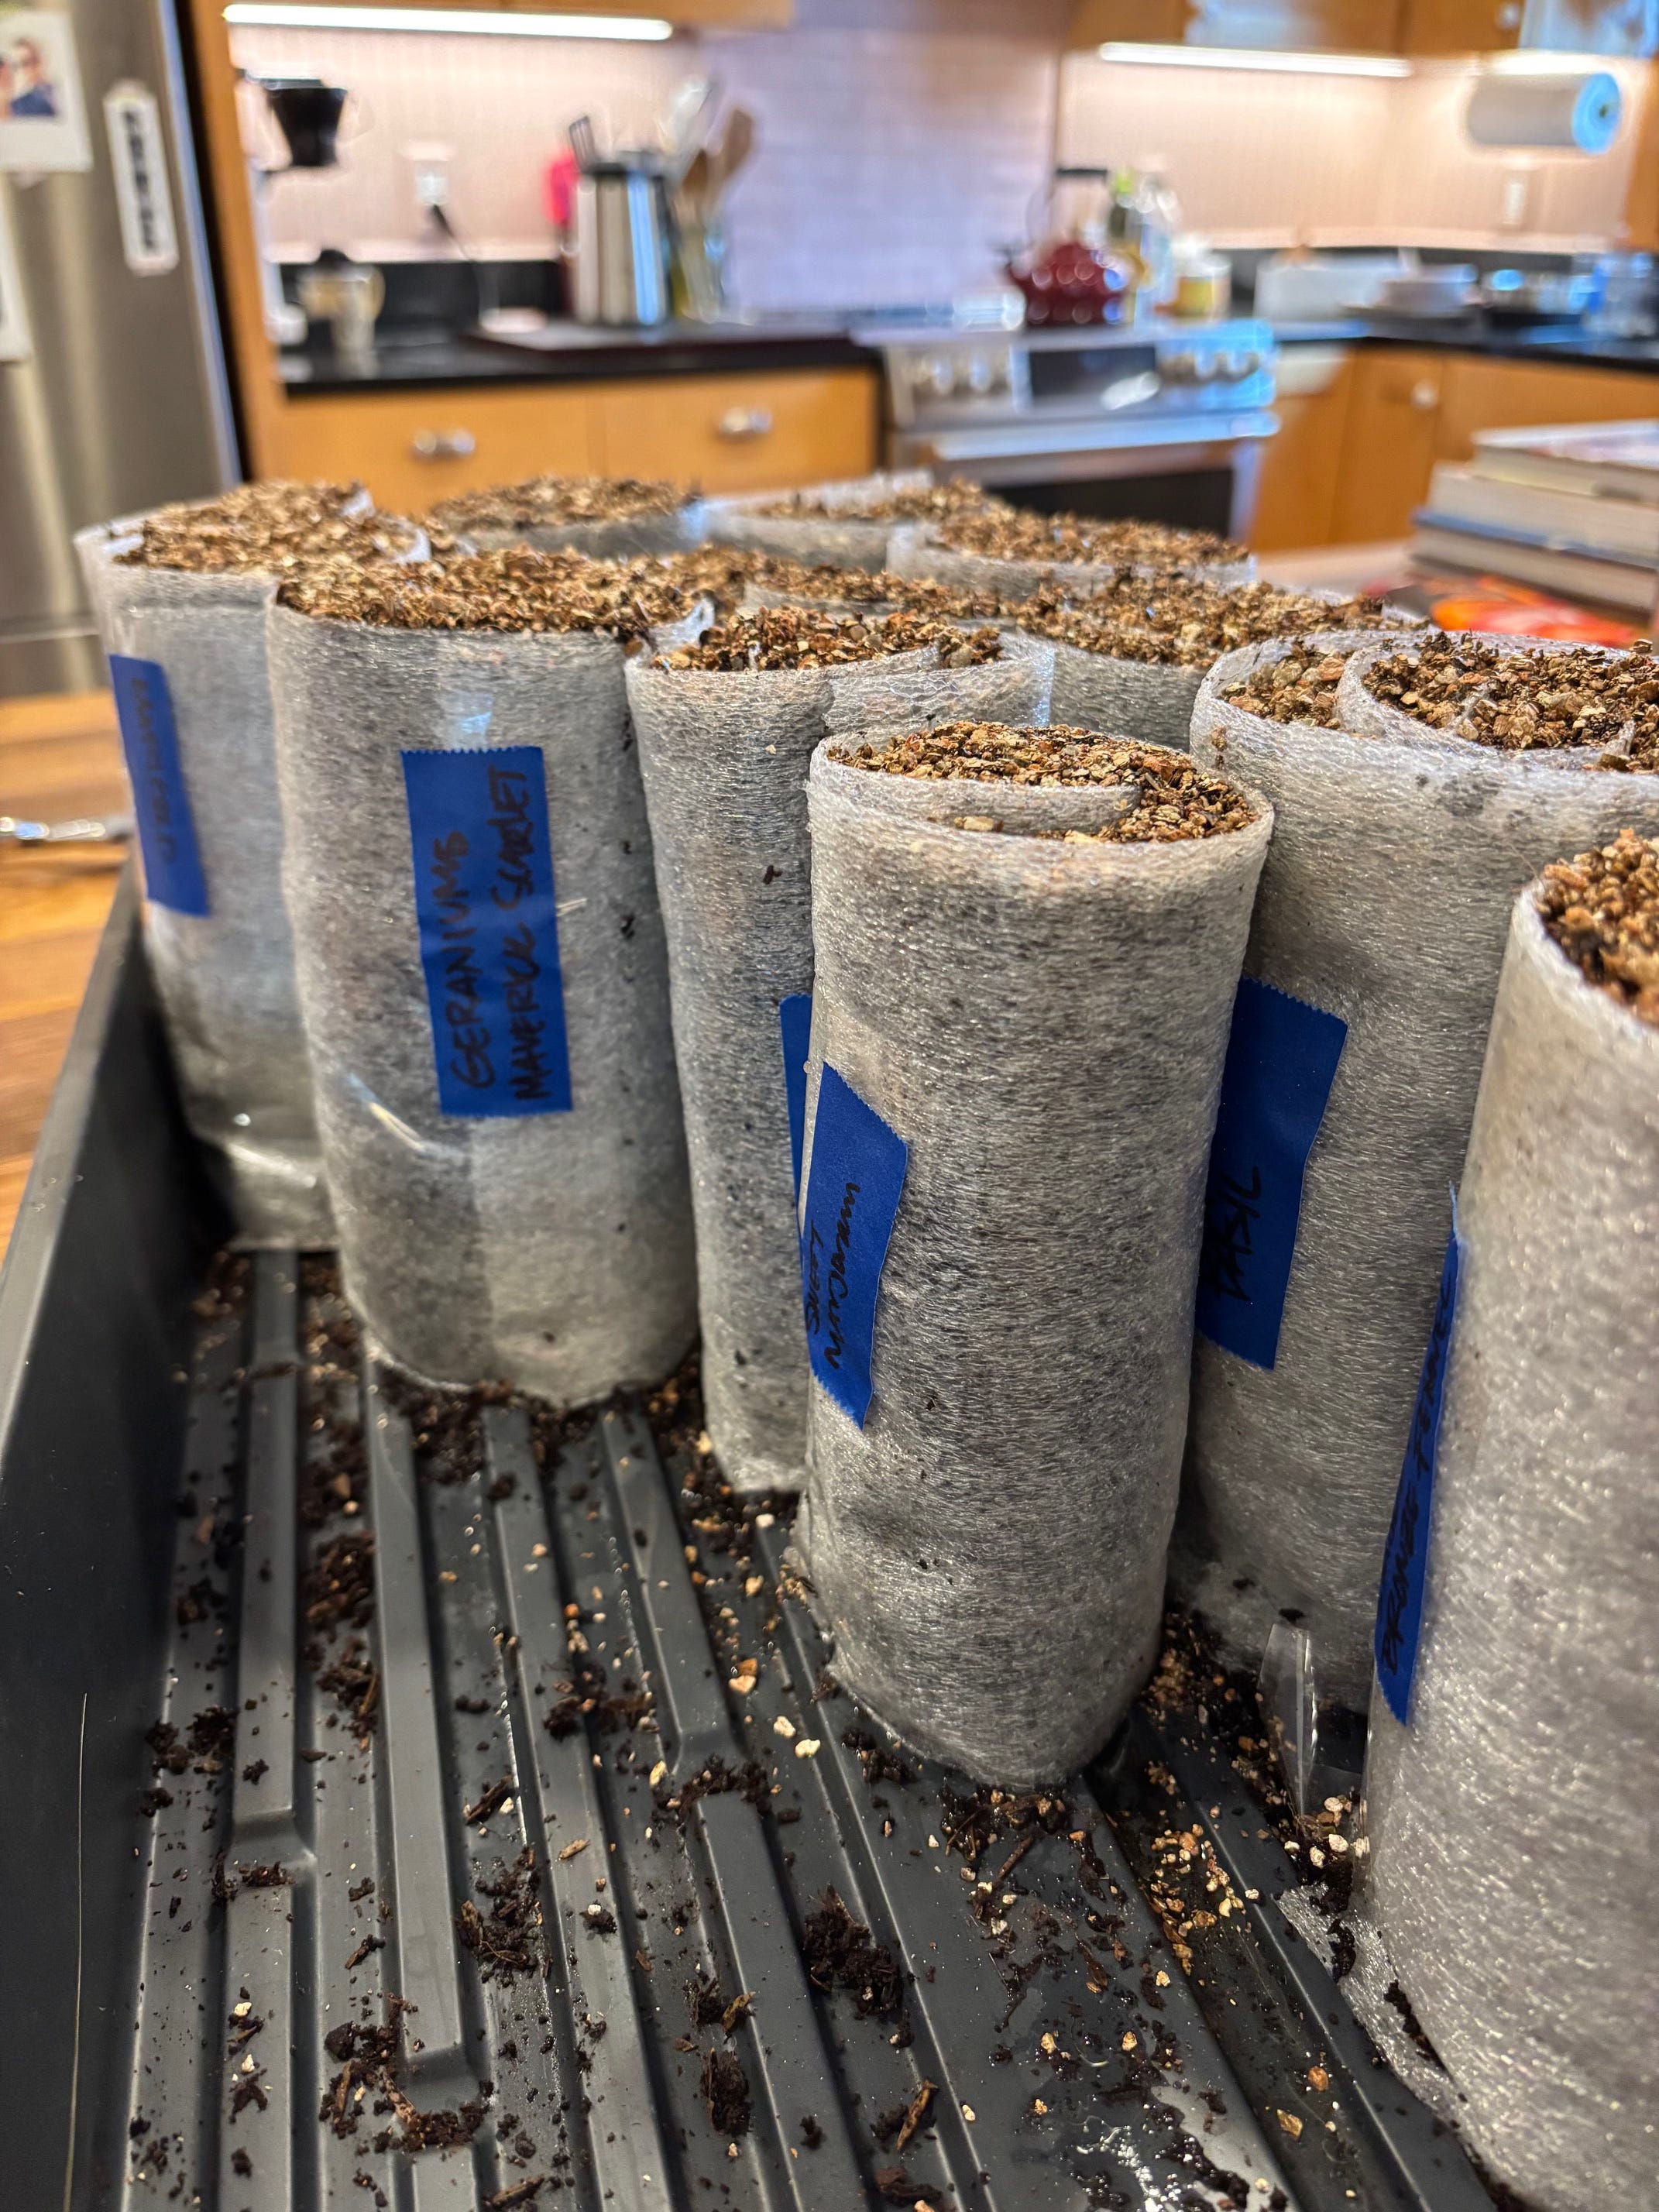
So many seeds in such a small amount of space! V. exciting. Don’t forget to label your snails!
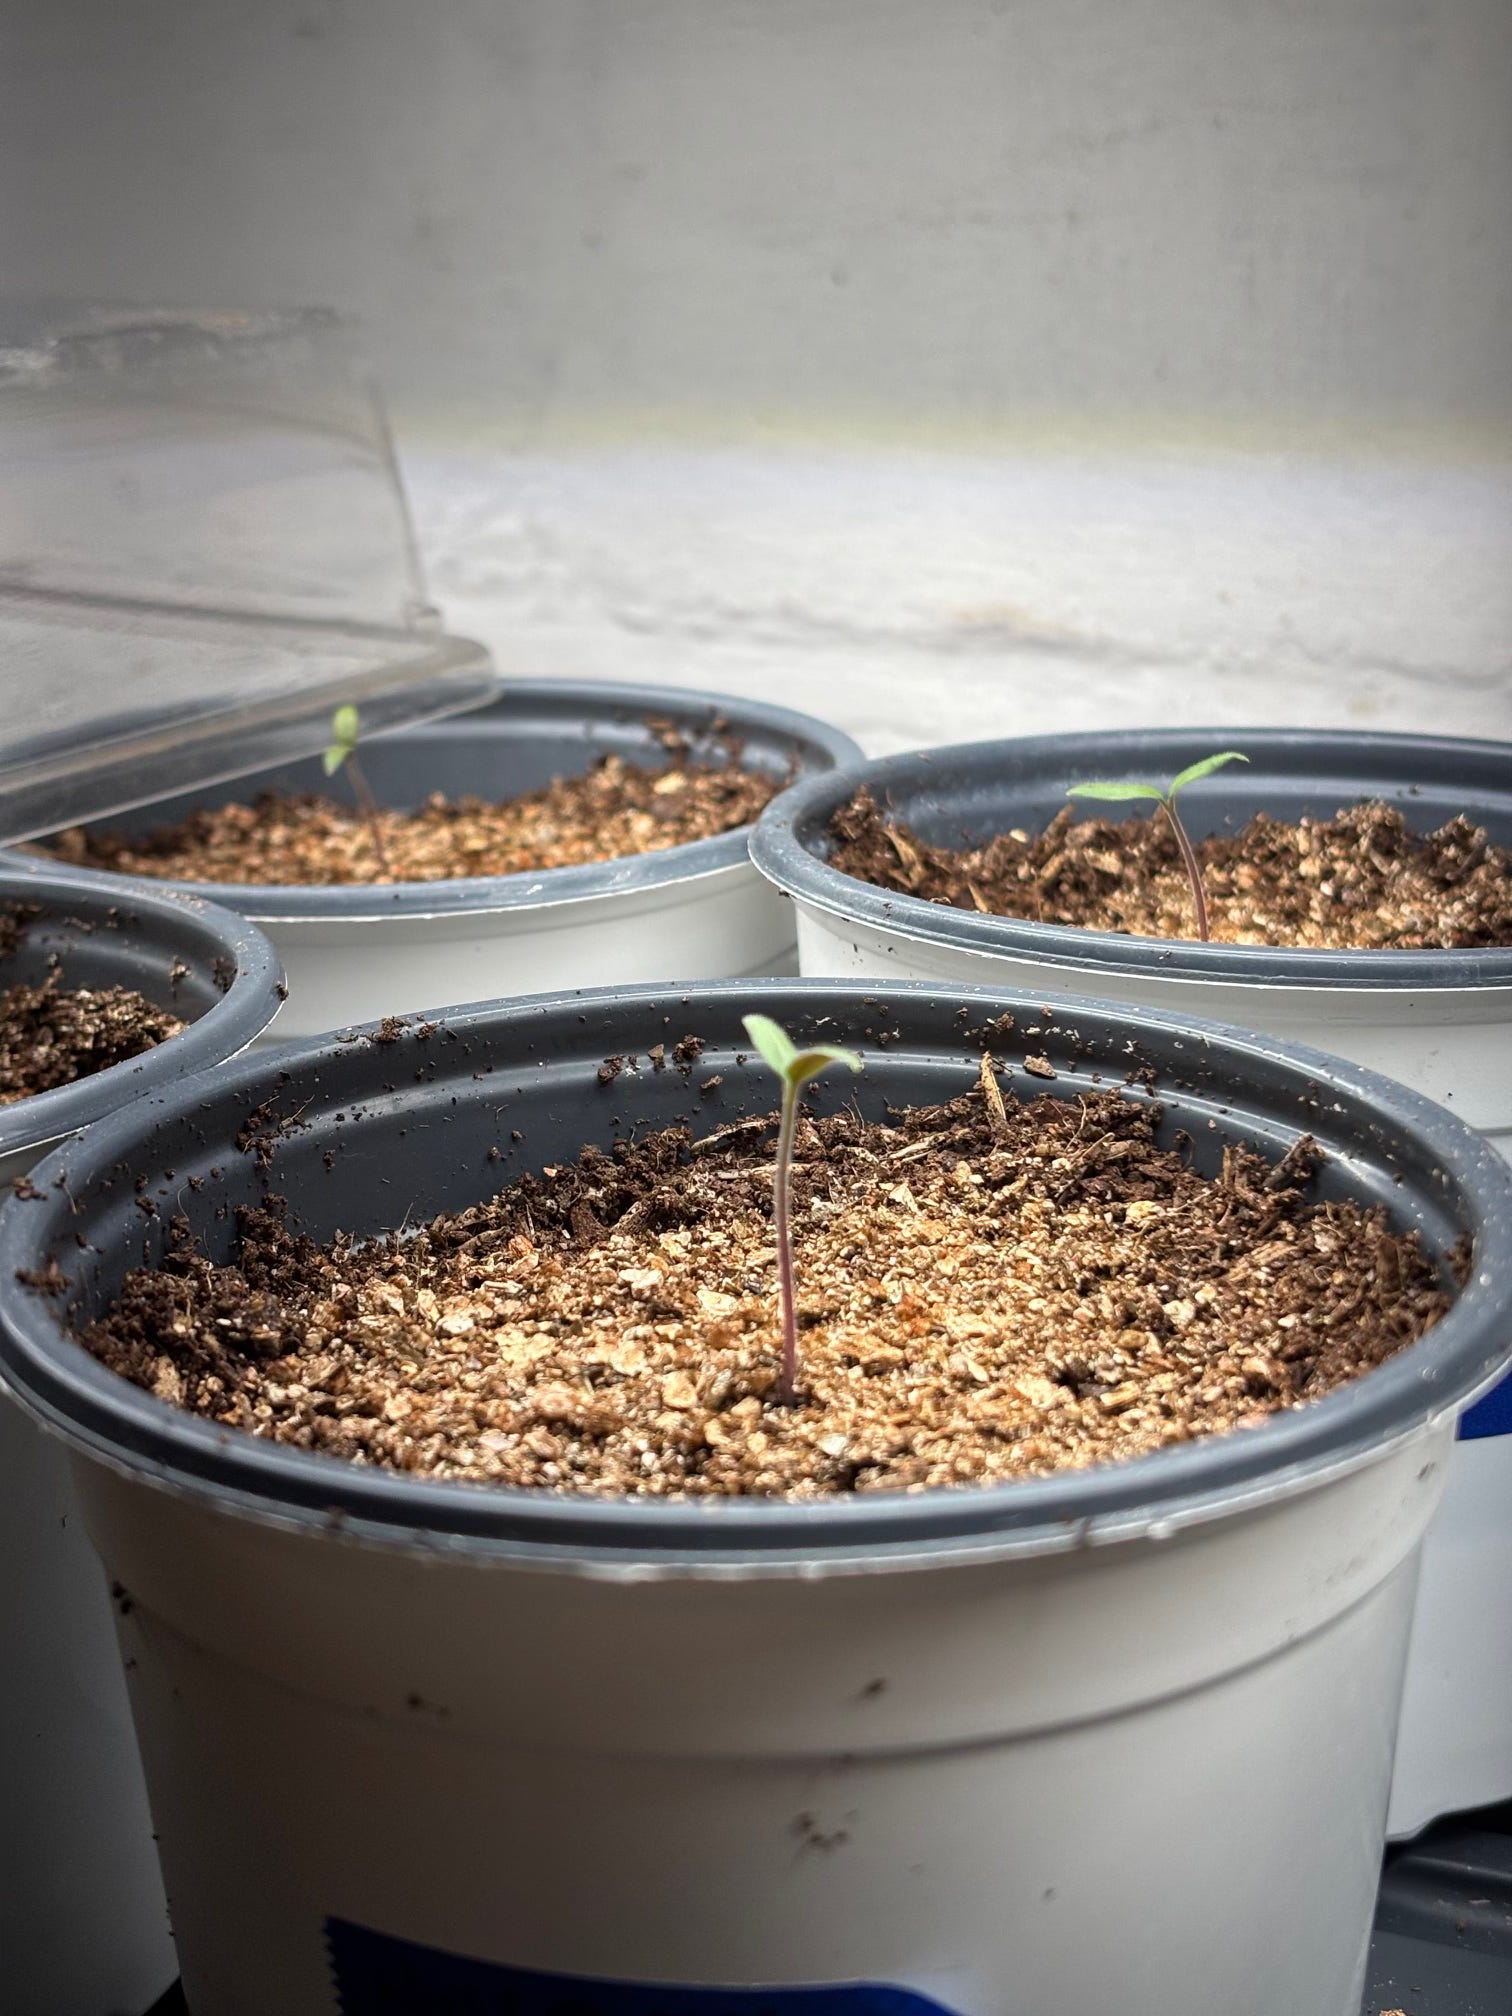
And look at my little veggie babes are already popping out of the soil like champs! After they all get their first true set of leaves, I’ll start using an oscillating fan to keep the air flowing and to keep the plants moving a bit to grow strong roots.
Hi buddy!
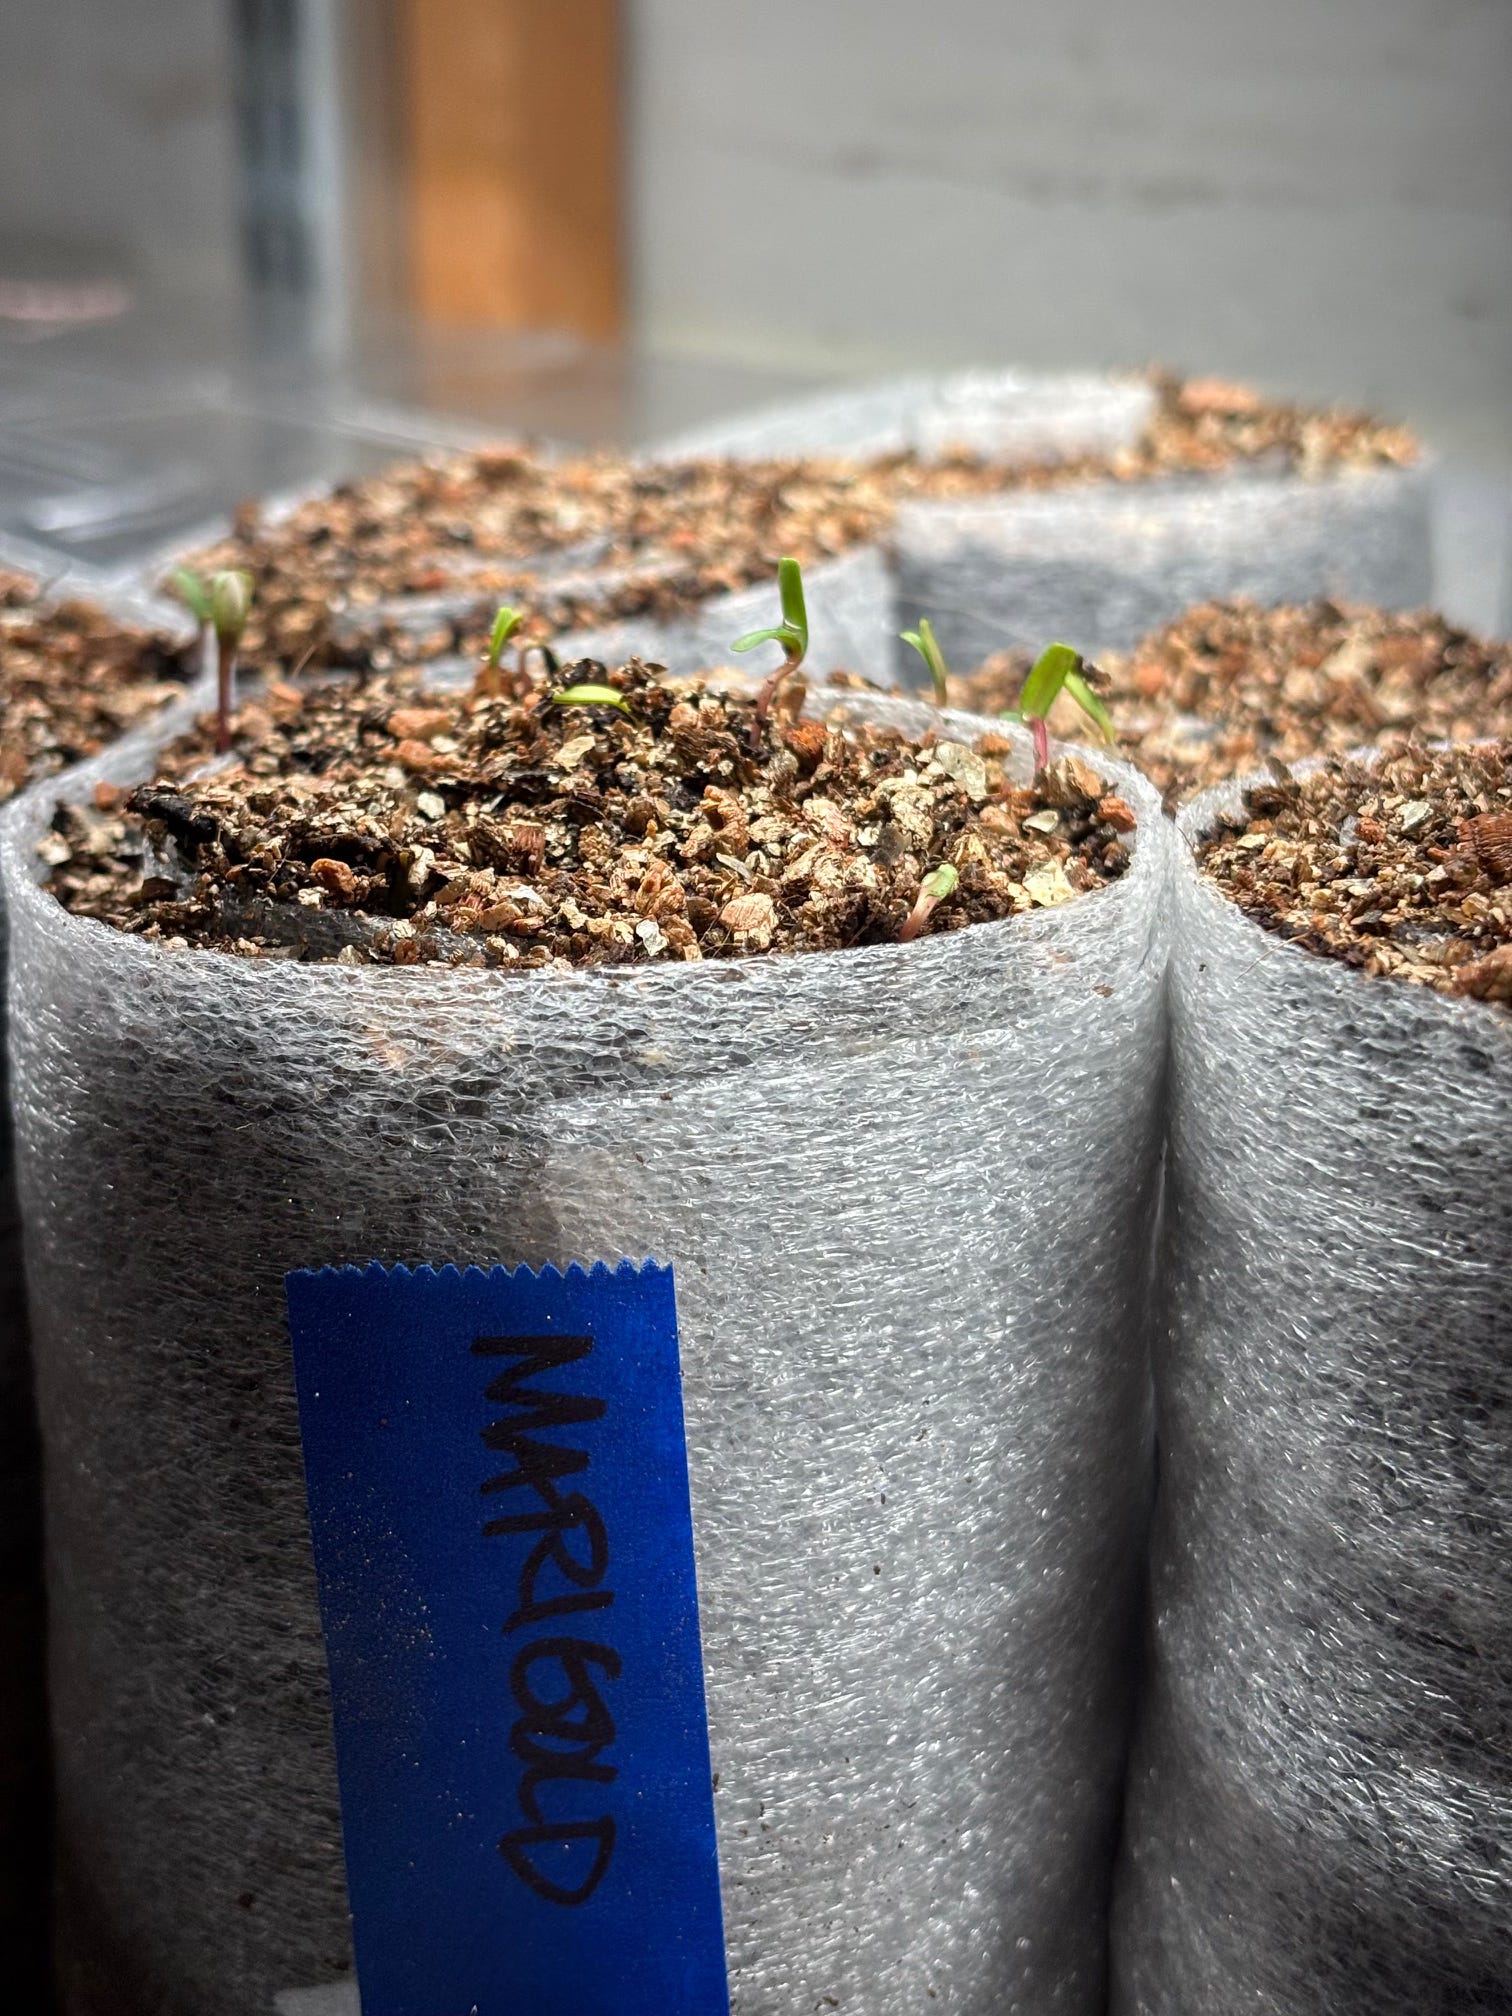
And I just went to check on my seed snails to see if there was anything else I should mention in this post and jeepers! They’re already sprouting!
Ok, get out there and plant some seeds! Summer is coming!
XOXO
Heidi